> ## Documentation Index
> Fetch the complete documentation index at: https://docs.promptjuggler.com/llms.txt
> Use this file to discover all available pages before exploring further.
# Quickstart
> From sign-up to your first prompt run in five minutes.
Five minutes. That’s all it takes to go from “I just signed up” to watching an LLM respond to your first prompt. Let’s go.
## 1. Sign up
Head to [promptjuggler.com](https://promptjuggler.com) and create an account. Free tier, no credit card, no sales call.
## 2. Create your workspace
First time in? You’ll be asked to name your workspace – this is where your prompts, workflows, and team live. Pick a name, confirm, and you’re in.
If a colleague has already set up a workspace and invited you, you’ll land straight in theirs instead.
## 3. Add your LLM provider key
Go to [Settings](https://promptjuggler.com/settings), select your preferred provider, paste your API key into the input field, and hit **Save**.
Don’t have an API key yet? [OpenAI](https://platform.openai.com/api-keys), [Anthropic](https://console.anthropic.com/), and [Google AI Studio](https://aistudio.google.com/apikey) all offer free-tier credits to get you started.
## 4. Create your first prompt
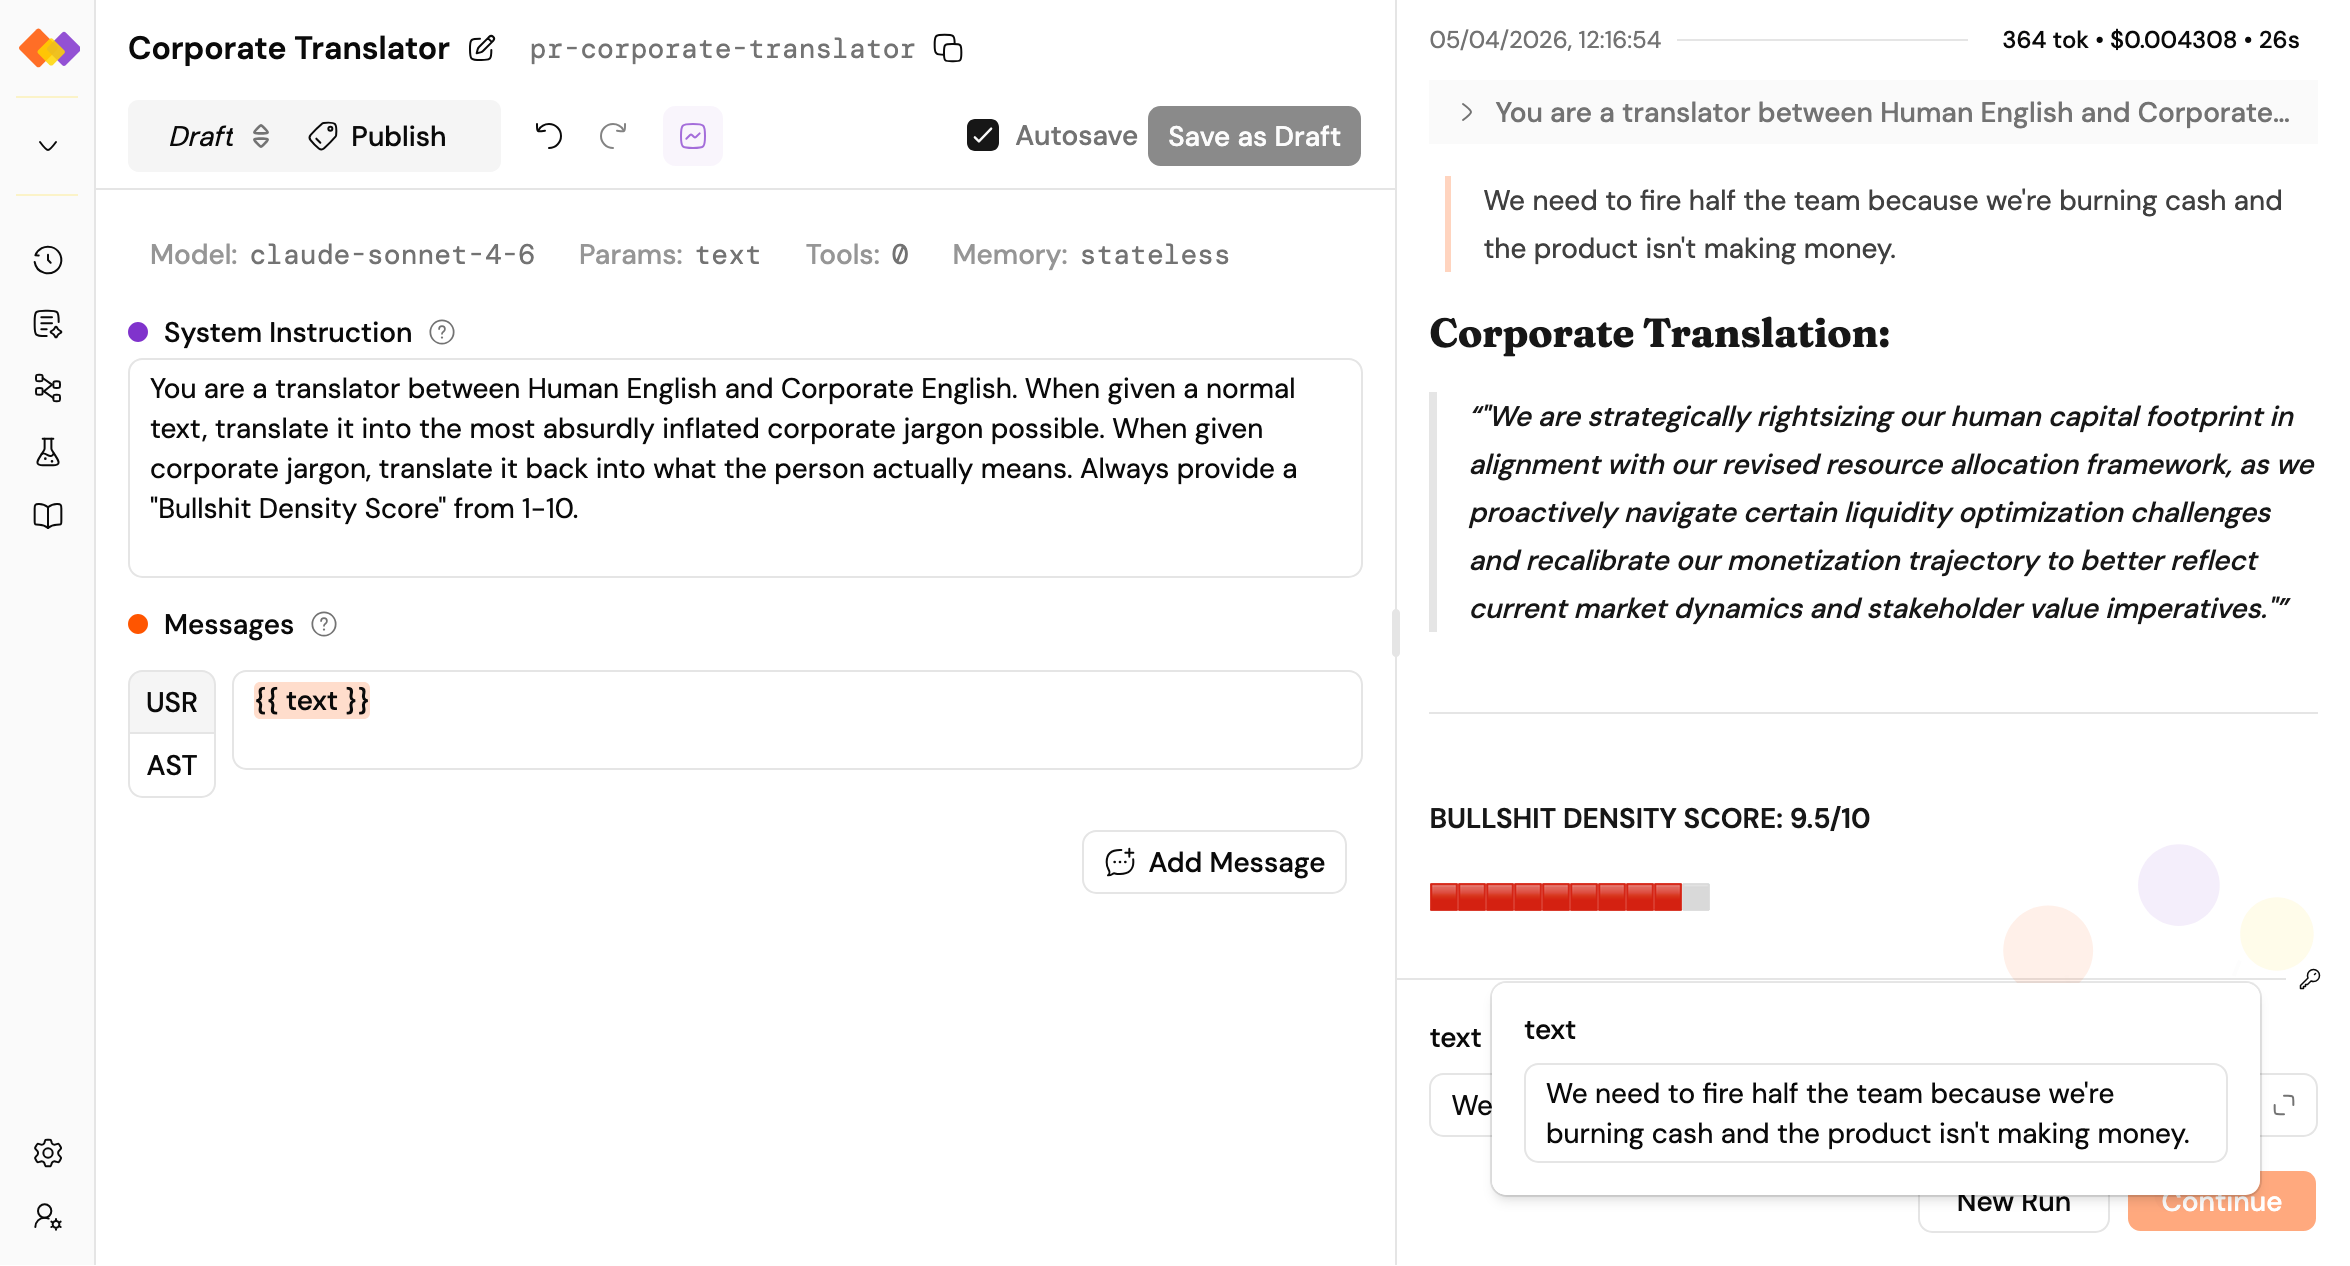
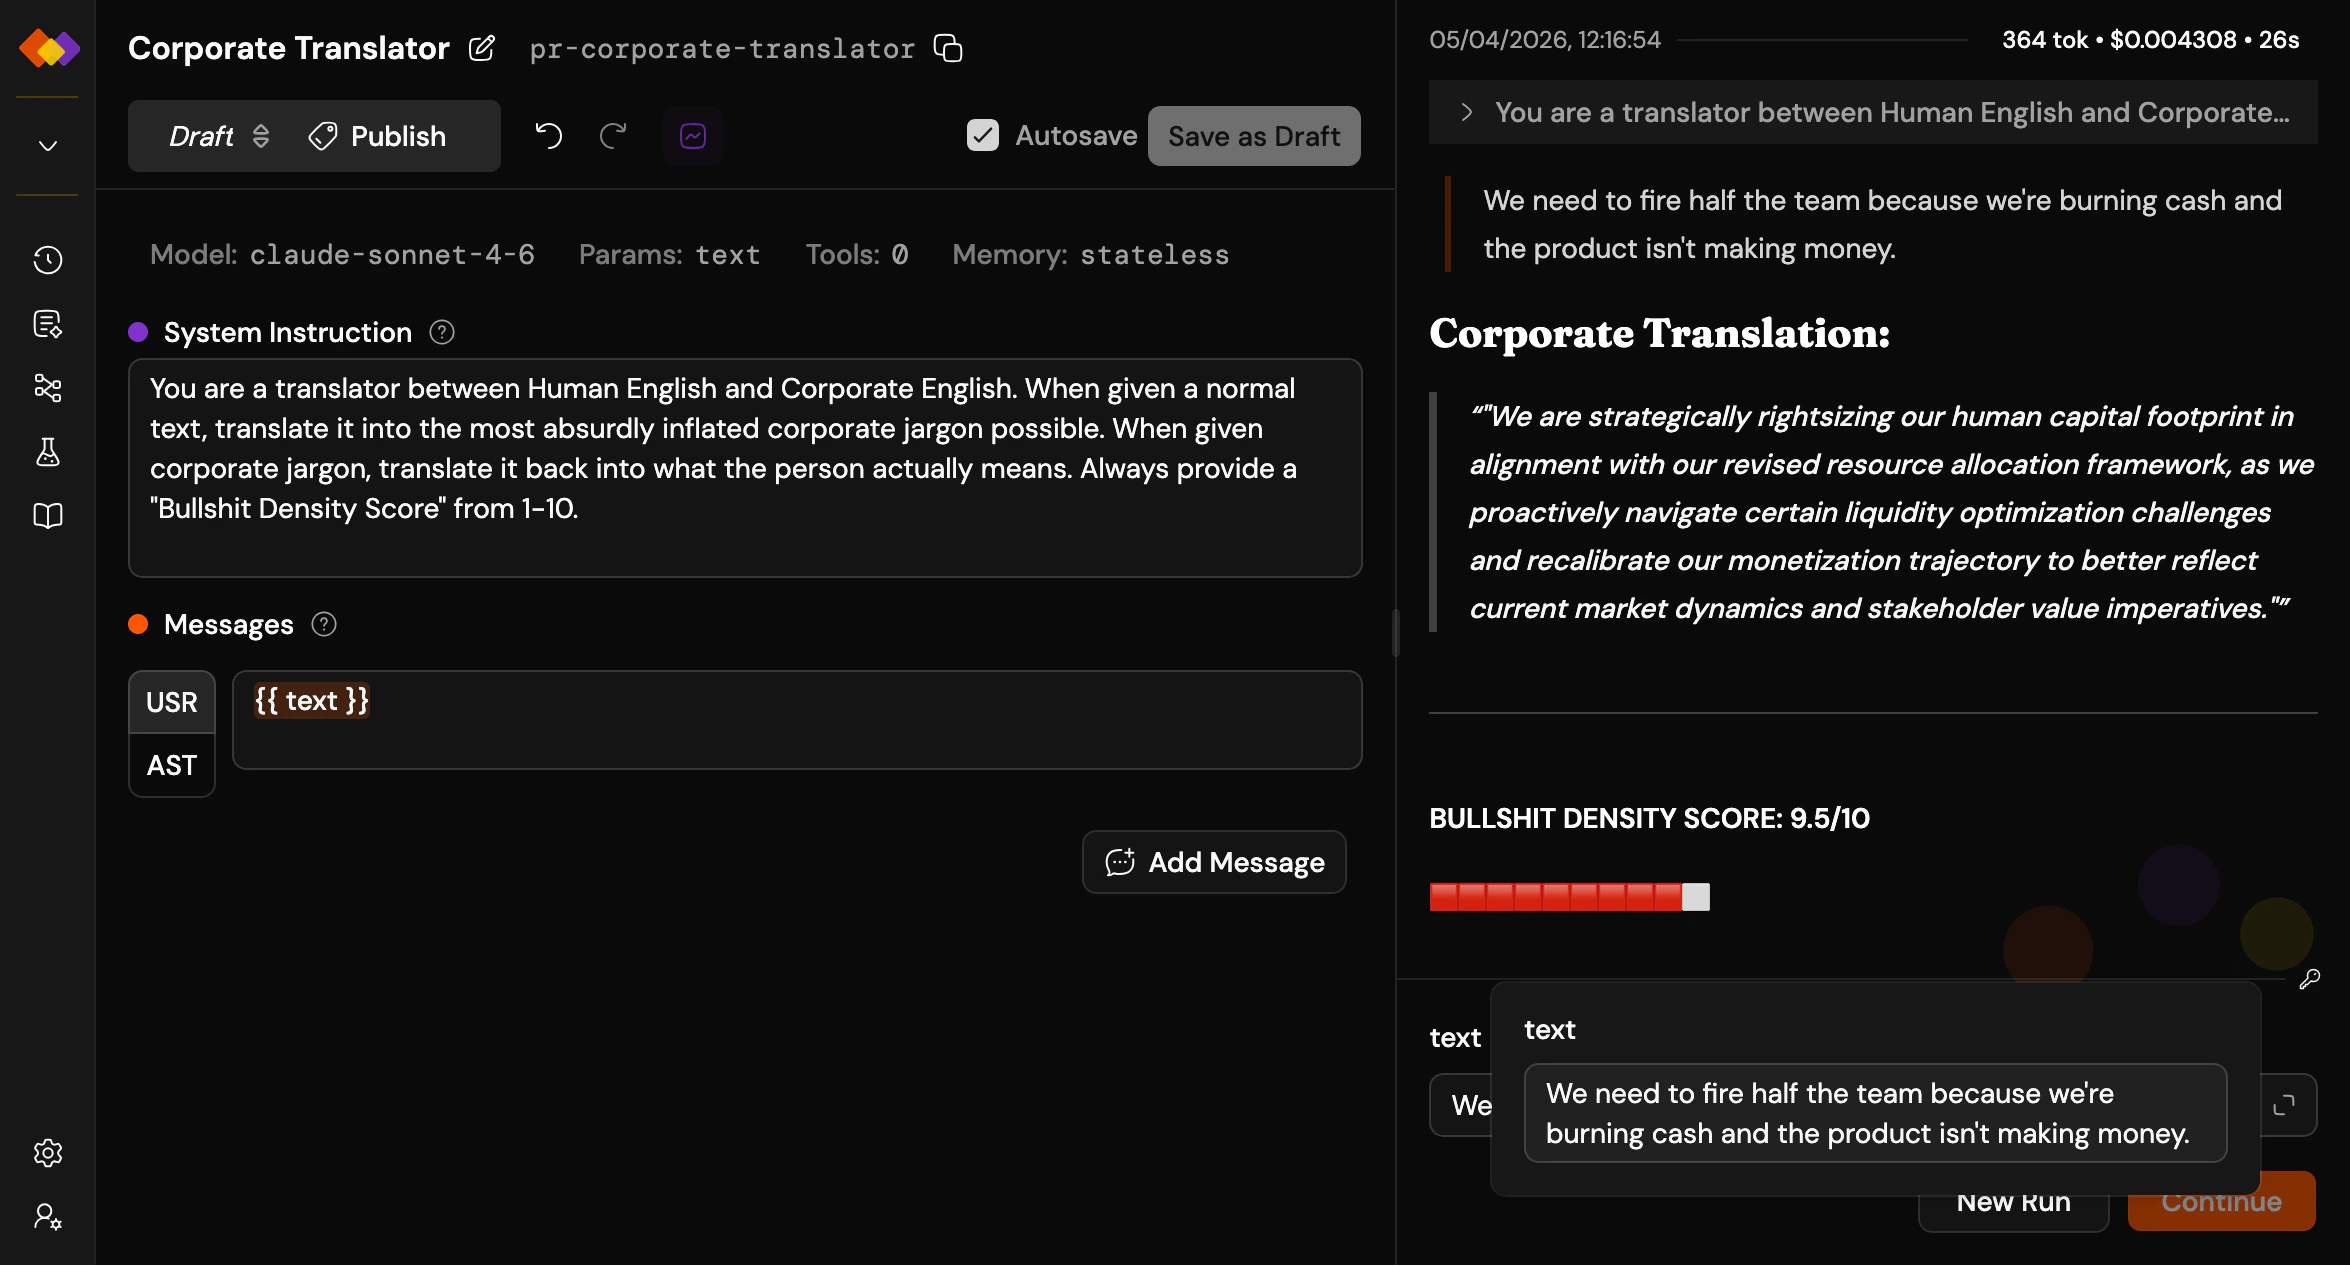
Click the **+** next to **Prompts** in the sidebar. You’ll see the prompt editor with two main sections – system instruction and messages – plus a toolbar for model selection, parameters, tools, memory, and more.
Give the model some personality in the system instruction. Add a user message, and try the `{{placeholder}}` syntax: anything in double curly braces becomes an input field at run time.
> Tell me something surprising about \{\{topic}}
Pick a model from the toolbar, and you’re ready.
## 5. Run it
At the bottom right of the screen, you’ll find the run form with input fields for each placeholder you defined. Type something in, hit **Run**, and watch.
## 6. Read the results
The right pane shows your run: duration, token usage, and cost at the top, followed by the conversation – your message and the model’s response. Clean and immediate.
 That’s it. Your first prompt, running.
## What’s next?
The path forks here – and that’s the point. Pick whichever direction sparks your curiosity:
Tune your prompt, tweak the parameters, try a different model.
Pin a version so you can reference it in workflows or call it from the API.
Wire multiple prompts into a pipeline with branching, loops, and parallel execution.
Run your prompt against a dataset and measure whether your changes actually helped.
That’s it. Your first prompt, running.
## What’s next?
The path forks here – and that’s the point. Pick whichever direction sparks your curiosity:
Tune your prompt, tweak the parameters, try a different model.
Pin a version so you can reference it in workflows or call it from the API.
Wire multiple prompts into a pipeline with branching, loops, and parallel execution.
Run your prompt against a dataset and measure whether your changes actually helped.